Google Certified Teacher.
It sounds good
CLICK HERE for the overview training
It's a helpful course.
Here are some of the important pages.... in the introduction of the course
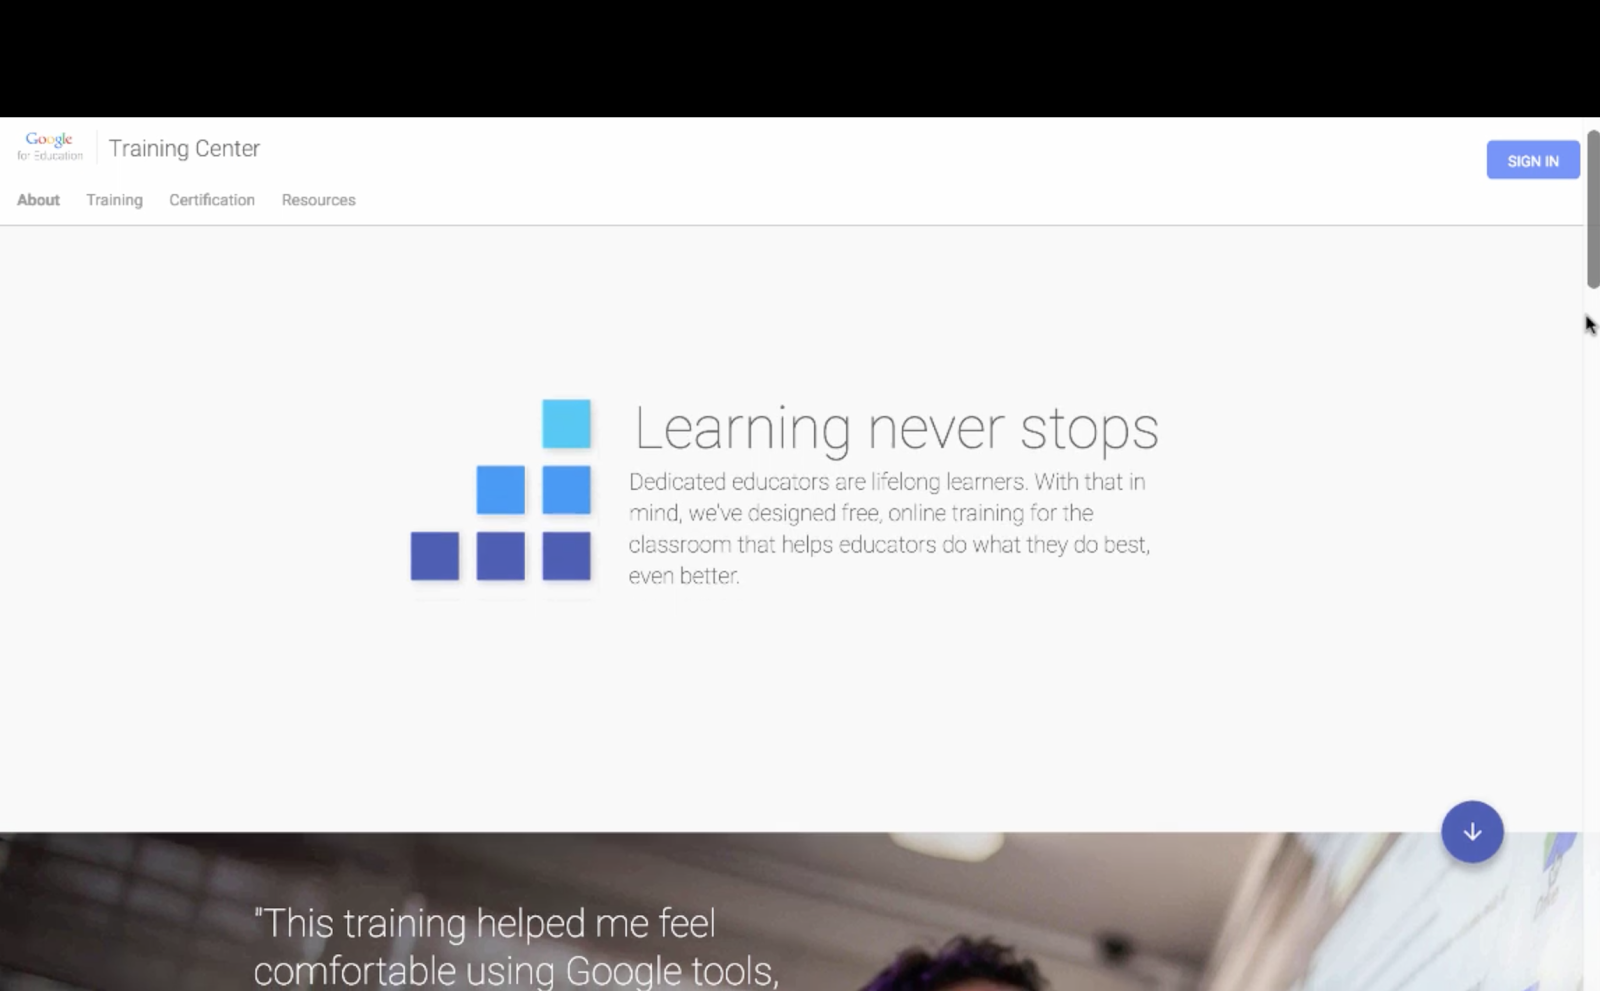
The Google for Education Training Center
The Training Center Landing Page
Hi, and welcome to the Google for Education Training Center; a site for professional development, built by educators for educators.
This video will give you an overview of the site, show you how to navigate it, and how each part works.
Let’s dive right in.
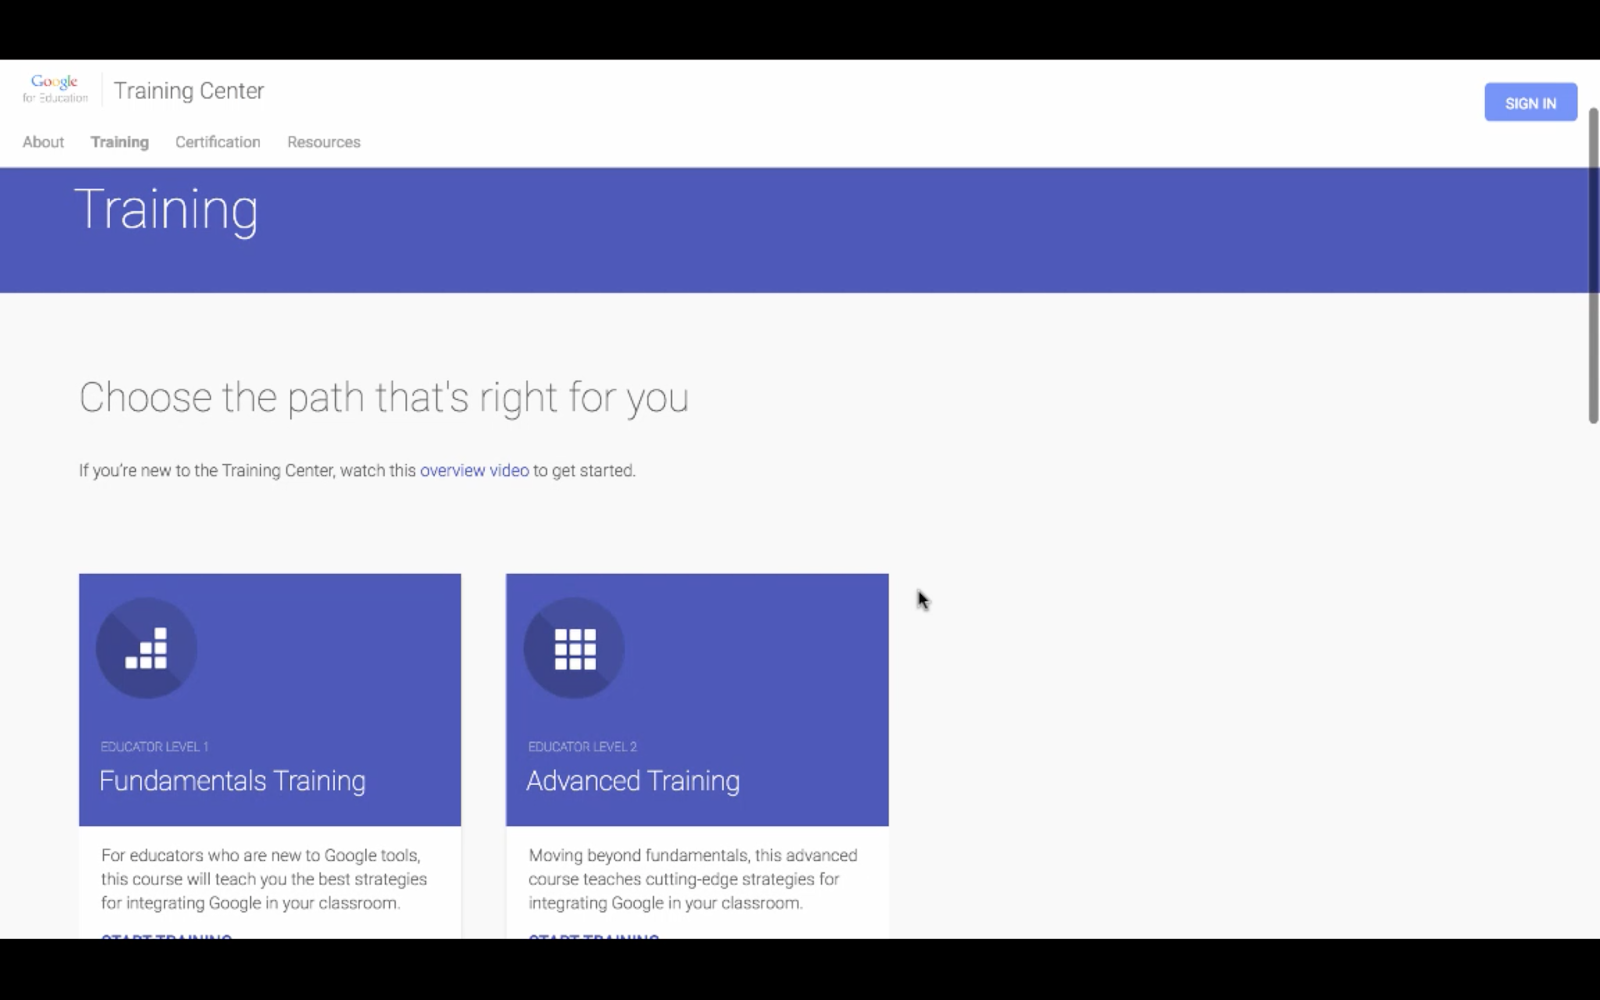
The training center has three main sections. The courses are available under the training menu, information about certifications is located in this tab, and we also have a collection of resources. For now, let’s get straight into the courses so click on Training. This navigation bar will always be at the top of any page.
The Training Landing Page
The Training tab will take us to the training landing page.
On this page you will find details for each course. We have the two main courses:
There’s the Fundamentals course. We recommend taking this if you are new to Google tools.
Then there’s the Advanced course. We recommend taking this if you already routinely use Google tools in the classroom.
Of course, if you sit somewhere in between then you can take lessons from both courses.
Below the two main courses you will see the Devices training. This is for teachers who want a deep dive on using Chromebooks or Android tablets.
Finally, we have a course for Trainers that’s hosted on a different website. You can access that course from this page as well.
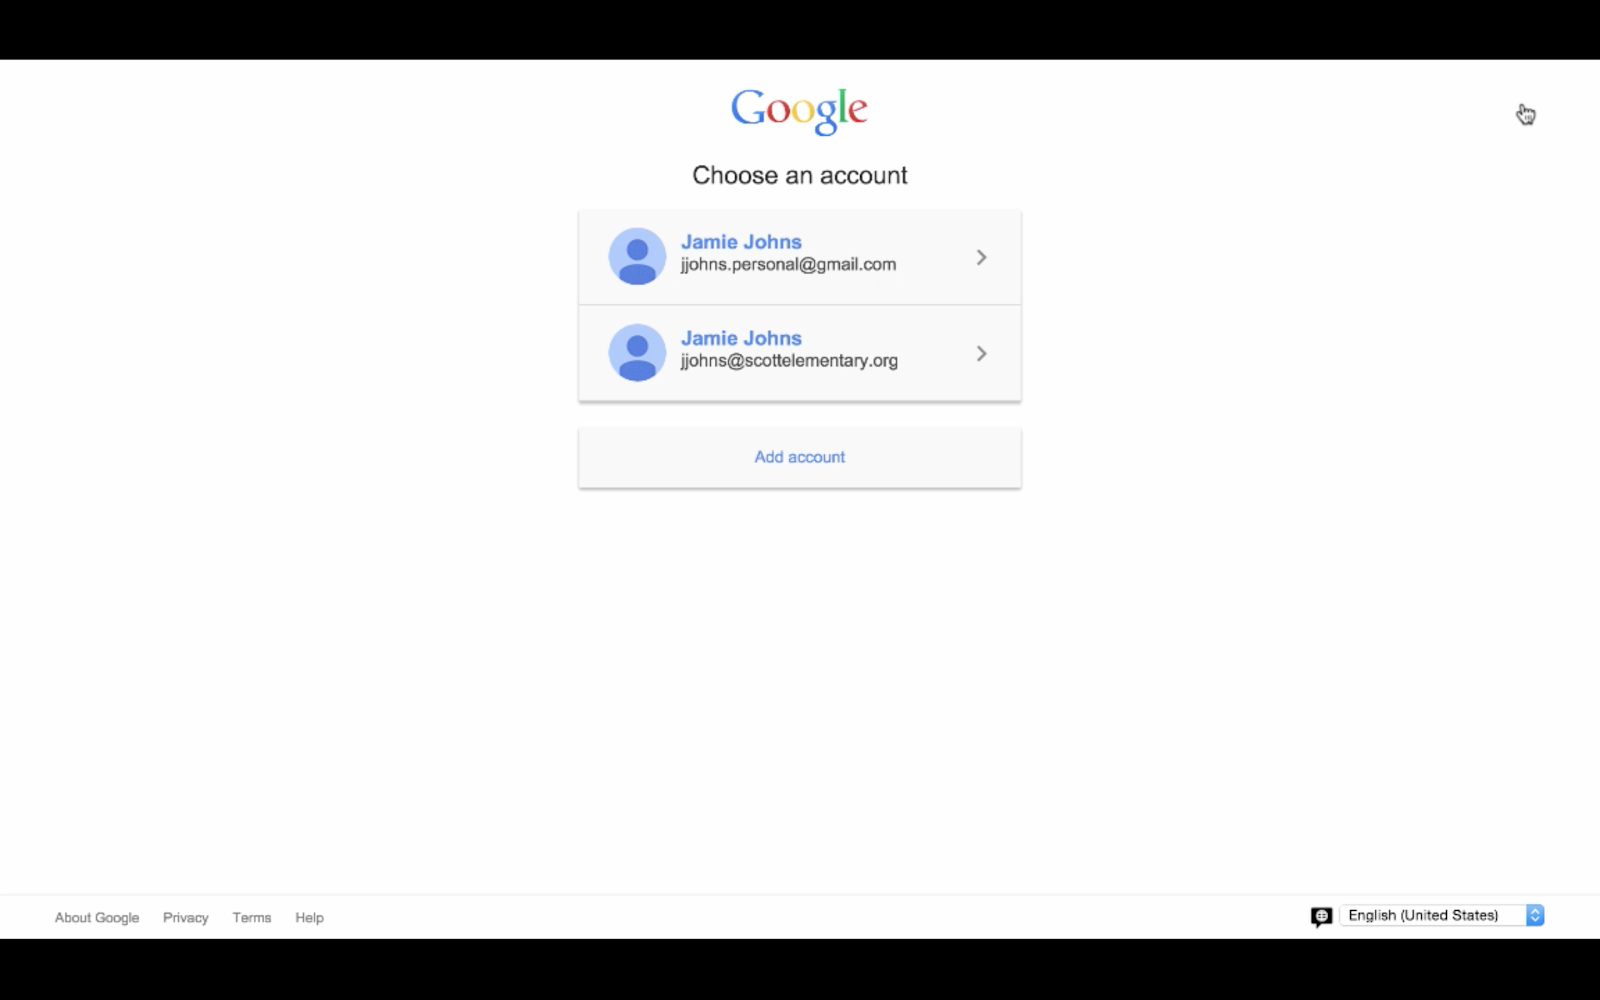
Signing In
Before we move on, let’s walk through signing in. Signing in lets the system track your progress so that you can see what you’ve already done, and what you still have left to do.
You can sign in from any page, and you must sign-in in order to view any lesson content, but don’t worry - you’ll be prompted to do so. We recommend using your Google Apps for Education account as some schools will be offering professional development credit for completing these modules. If your school doesn’t use Google Apps, you can login using your gmail account
Now that we’ve signed in, let’s get into a course. Let’s start at the Fundamentals training course by clicking on the Fundamentals box.
Fundamentals Course Overview Page
This takes us to the Fundamentals course overview page.
Content in the fundamentals and advanced courses is organized by three themes:
Engage in Professional Growth and Leadership
Increase Efficiency and Save Time
Facilitate and Inspire Student Learning and Creativity
Within these three themes we have a number of units. For example, you can see that two of the units in the third theme are:
Each Unit is then made up of multiple lessons, each represented by a dot which turns green once they’ve been completed. You’ll need to be signed in to see these dots and track your progress.
Let’s jump into a unit to look at the lessons in more detail. You can go to any unit by clicking on the title.
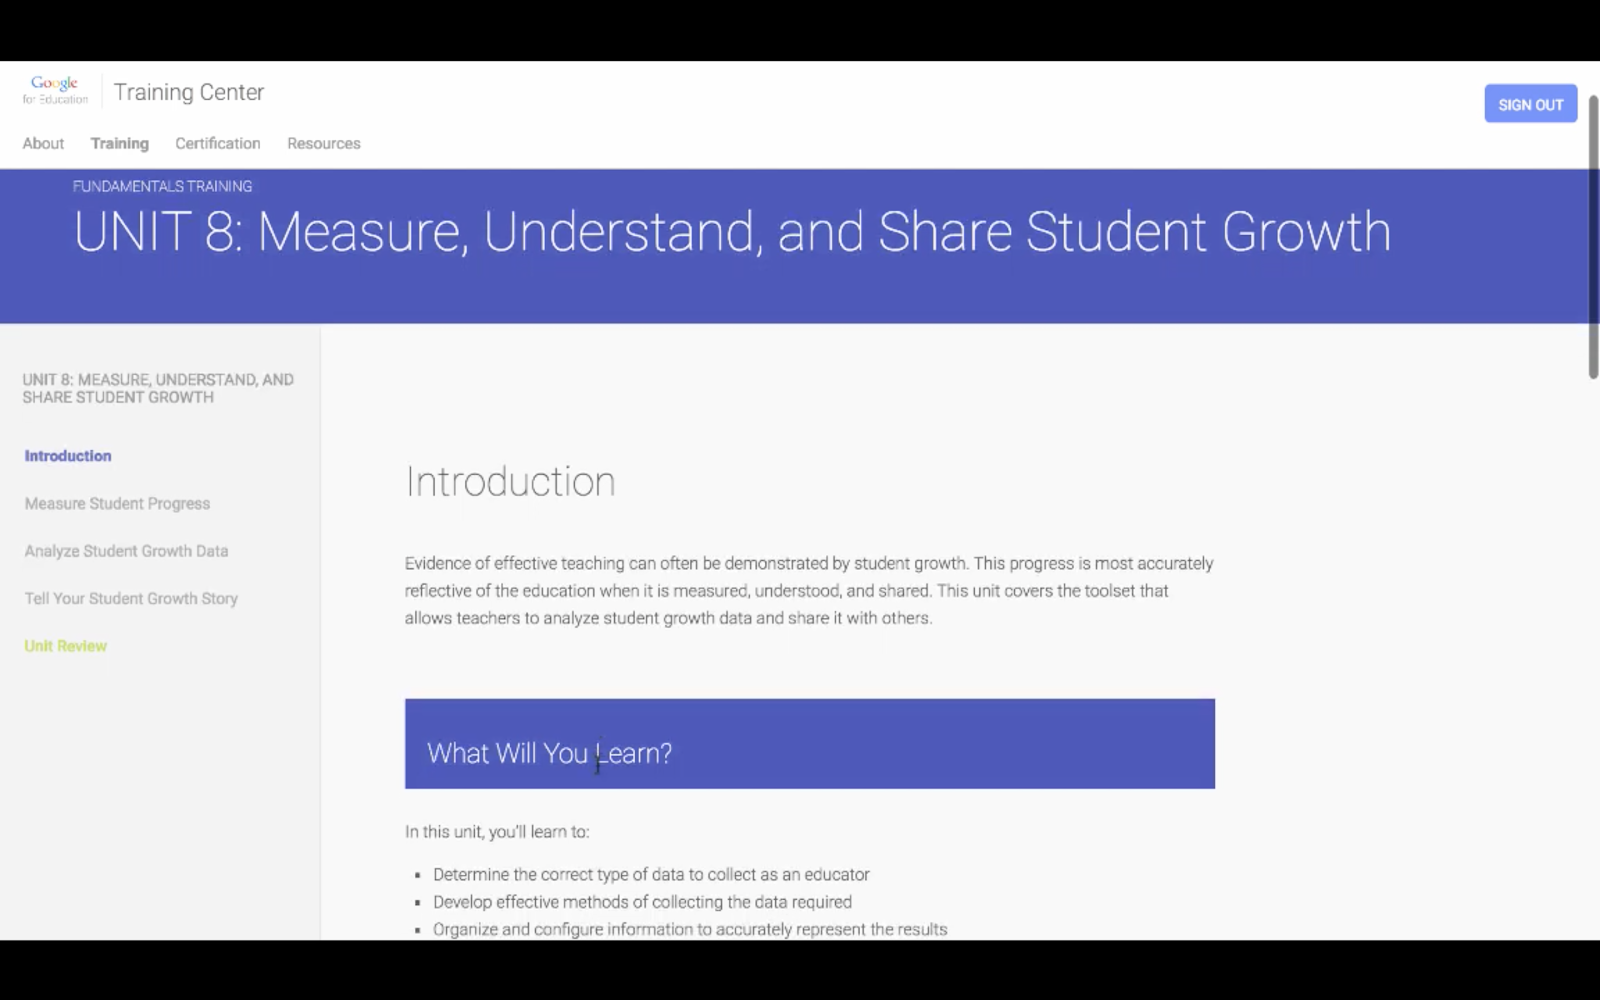
Unit Introduction Page
Each unit is divided into three parts; the introduction, the lessons, and the unit review.
The Introduction gives an overview of what you will learn. It mentions the products you’ll use and the skills you’ll develop as you take the unit. Help center links are provided, but you don’t need to review all the content prior to taking a lesson. The lessons will teach you what you need to know in depth.
You can navigate to the next lesson by using the navigation bar on the left, or at the end of the introduction.
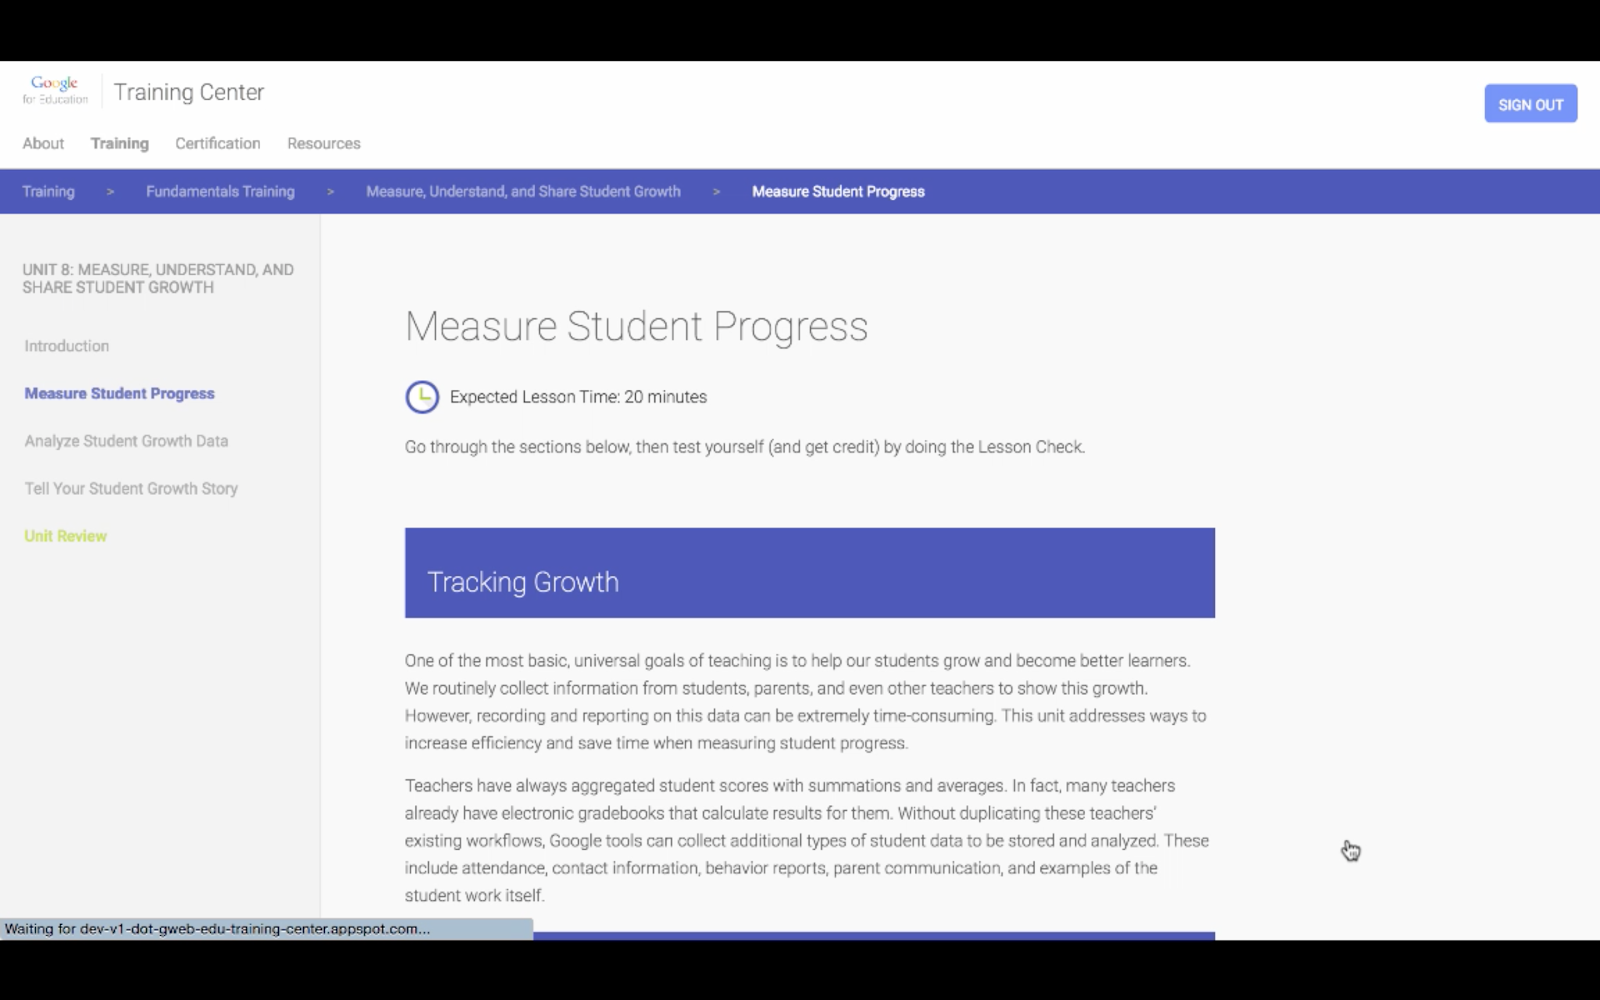
Lesson Page
Here is an example lesson.
Each lesson is different and contains several learning modales to help you get the most from the content. Some lessons have video and audio. Others have cards that you click to expand to reveal more information.
Many lessons have a notepad for you to reflect or jot down ideas. This text isn’t saved but is used to organize your thoughts.
Most lessons allow you to see responses to the prompt from other educators. After coming up with your own ideas, you can click on the right arrow to reveal these responses.
Other lessons, like this one, have an activity for you to complete. In order to open the activity in a new tab, you’ll need to click on the Google Docs icon to the right of the activity bar. Click on Make a Copy and you can work through the activity knowing it is automatically saved in your Drive.
Every lesson ends with a Lesson Check designed to reinforce a few key points. Check your answer after every question. If you don’t get it right the first time, try again! You’ll need to complete the lesson check in order to get credit for the lesson. This check is just for you and answers are not stored.
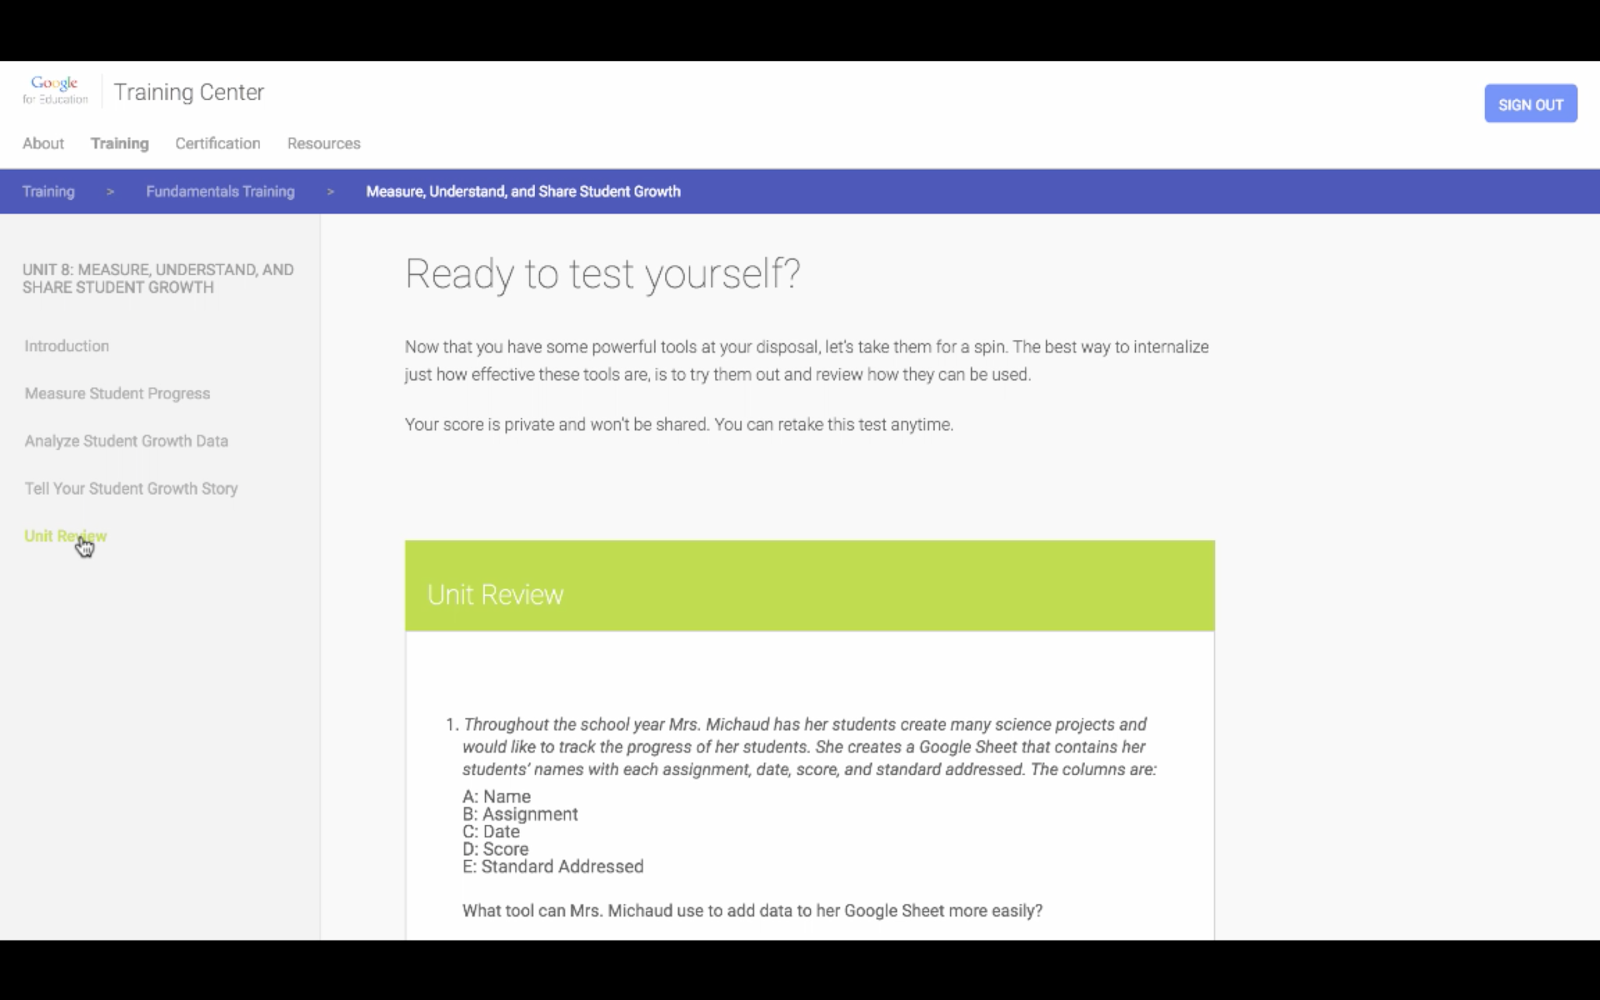
After completing all the lessons in one unit, you’ll want to complete the Unit Review. You can access it through the left navigation bar, or from the bottom right of the last lesson in a unit.
Unit Review
The Unit Reviews test your knowledge across an entire unit and gives you a score once you submit your answers. Incorrect answers will be marked in red. You can always resubmit if you’d like to change any of your answers.
Unit review scores are not recorded, but you’ll need to answer each question in order to get credit for completion.
Fundamentals Course Overview Page
If we jump back up to the course overview page, you will see the unit is now marked as complete as denoted with a green check mark. You can also click on Progress in the left sidebar to track your unit completions.
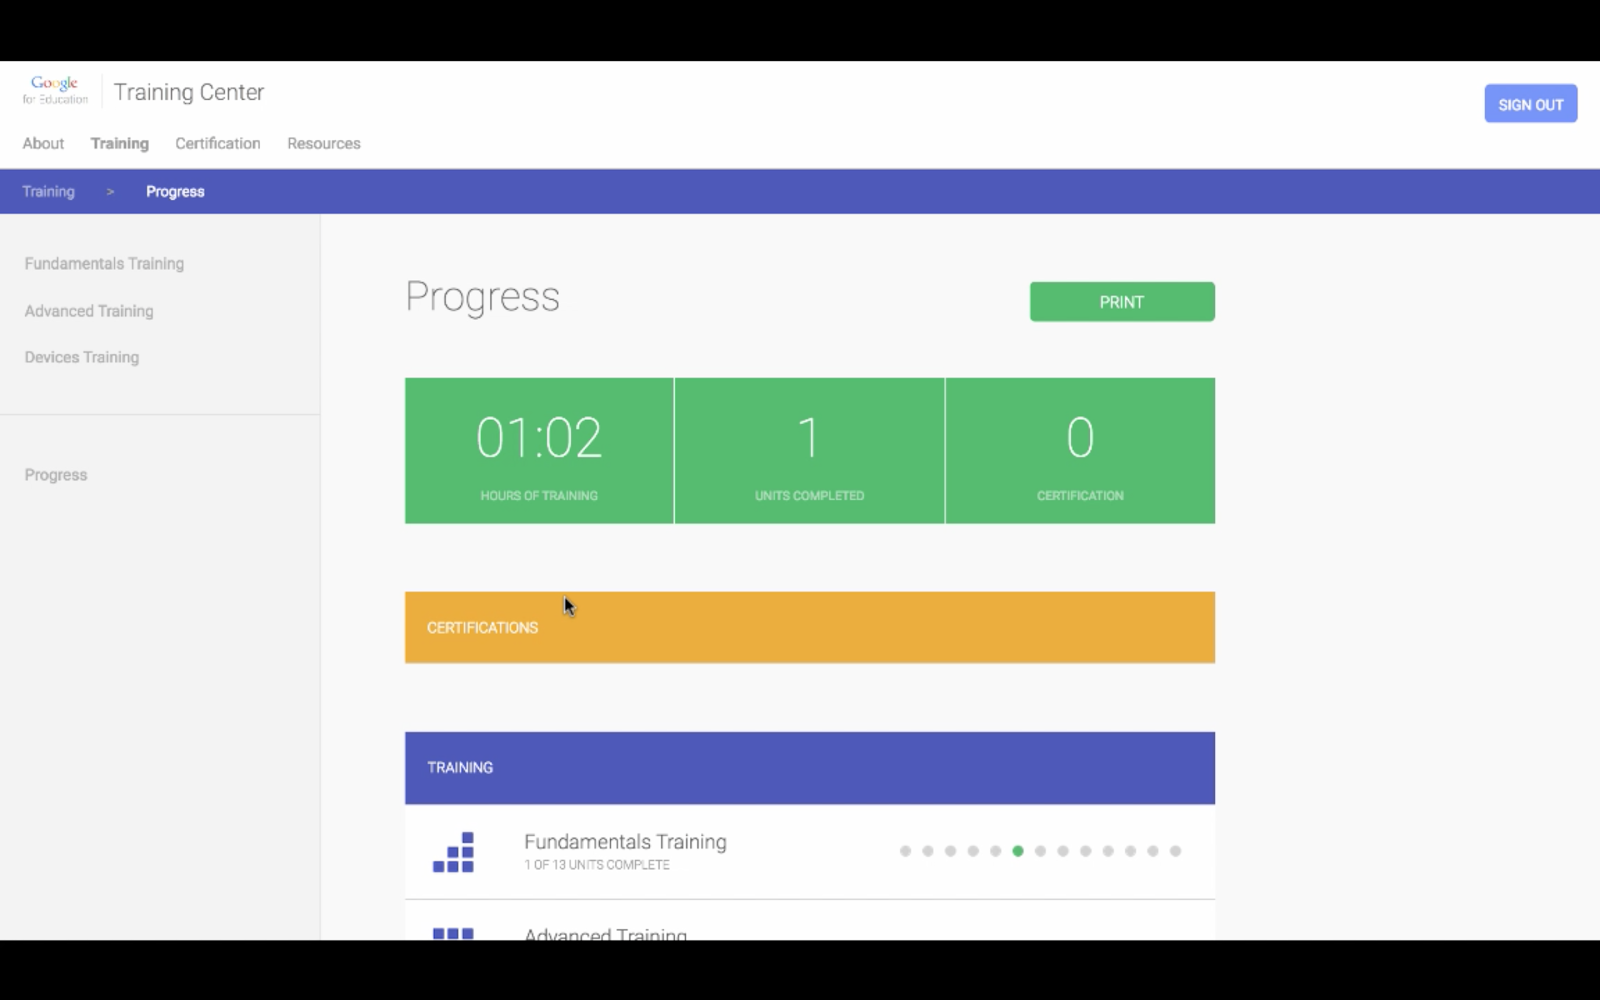
Progress Page
The Progress page allows you to see how many units have been completed, an estimated time spent on the course, and certifications.
You can print this page as evidence of training progress to submit to your administration.